This is how you’d make a simple head cast.
You’ll need:
– 2 people to apply
– 1 willing victim
– Clingfilm
– Alot of modroc.
– Bin Liners
– Bowl of Water
– Masking tape/ brown parcel tape
– Vaseline.
– plywood
– 2×2 wood
– Screws
– Screwdriver
– Plaster
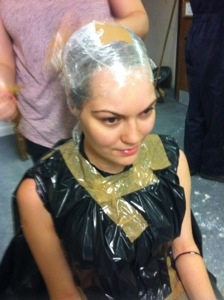
1. Prepare your willing victim … In this case, we have Jennifer . As seen in the picture below, cover all hair in Clingfilm tightly and tape down any loose ends or areas that water could pour through. Cover their face and specially their hair line , eyebrows and eyelashes heavily with Vaseline. This will stop all their hair coming off and leaving you with a now bald victim. Also cut the bin liner into a very fashionable poncho to prevent anything splashing on clothes. Use the tape to seal the neck line to not let any water in.
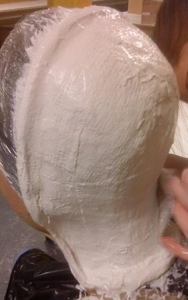
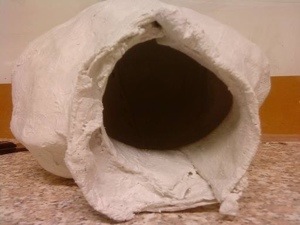
2. Make a seem line with mod roc all the way around the middle of head, halving the ears. And build up a ridge using the mod roc. This will make it easier to determine where the two halves meet and also make the half stronger. Continue to apply mod roc all over the back half of the head until it is completely cover with at least 3 to 4 layers.
Add more ridges running across the back half to help strengthen the shape when released.
3. Once the back half is done , apply heavy amounts of Vaseline to the side of the seam line ridge that you created. This will cause easy release later on.
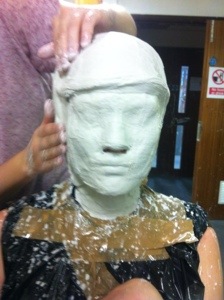
4. Now its time for the front half. Remember do not cover the facial features until the last moment.
Create another mod roc seam line beside the seem line of the back half, making sure not to overlap the two. Cover the sides, forehead , chin and neck then lastly eyes and noes. DO NOT cover the nostrils or any part of the underside of the nose, leave it clear. Cover the whole face with 3 to 4 layers.
5. Building ridges along the brow line to strengthen the mould. Wherever you think could be a weak area, building one there too.
6. While the front half if starting to set, the back half will be set enough to remove without damage, although still remove it gently just incase.
Release the back half from the bottom of the neck. By keep and clear seam line and using Vaseline on the seam earlier this should be easy to remove. Place down delicately.
7. The front half will be set enough to remove now. Release this half from the top of the head. ( any other way it could catch onto facial feature and the chin and won’t come off easily, and may worry the ‘victim’.)
8. Once removed, Vaseline the inside of each of the halves and the seam lines again.

Then line the two halves back up together and mod roc over the seams. When moving this about, be careful not to crush the delicate facial features.
9. Once the seam is well sealed ,modroc the underside of the nose. Use old cloth, mix plaster and submerge the cloth in it, then, like the modroc, place the plaster cloths over the mod roc mould. This helped to strengthen the mould and also seal any possible leaks.

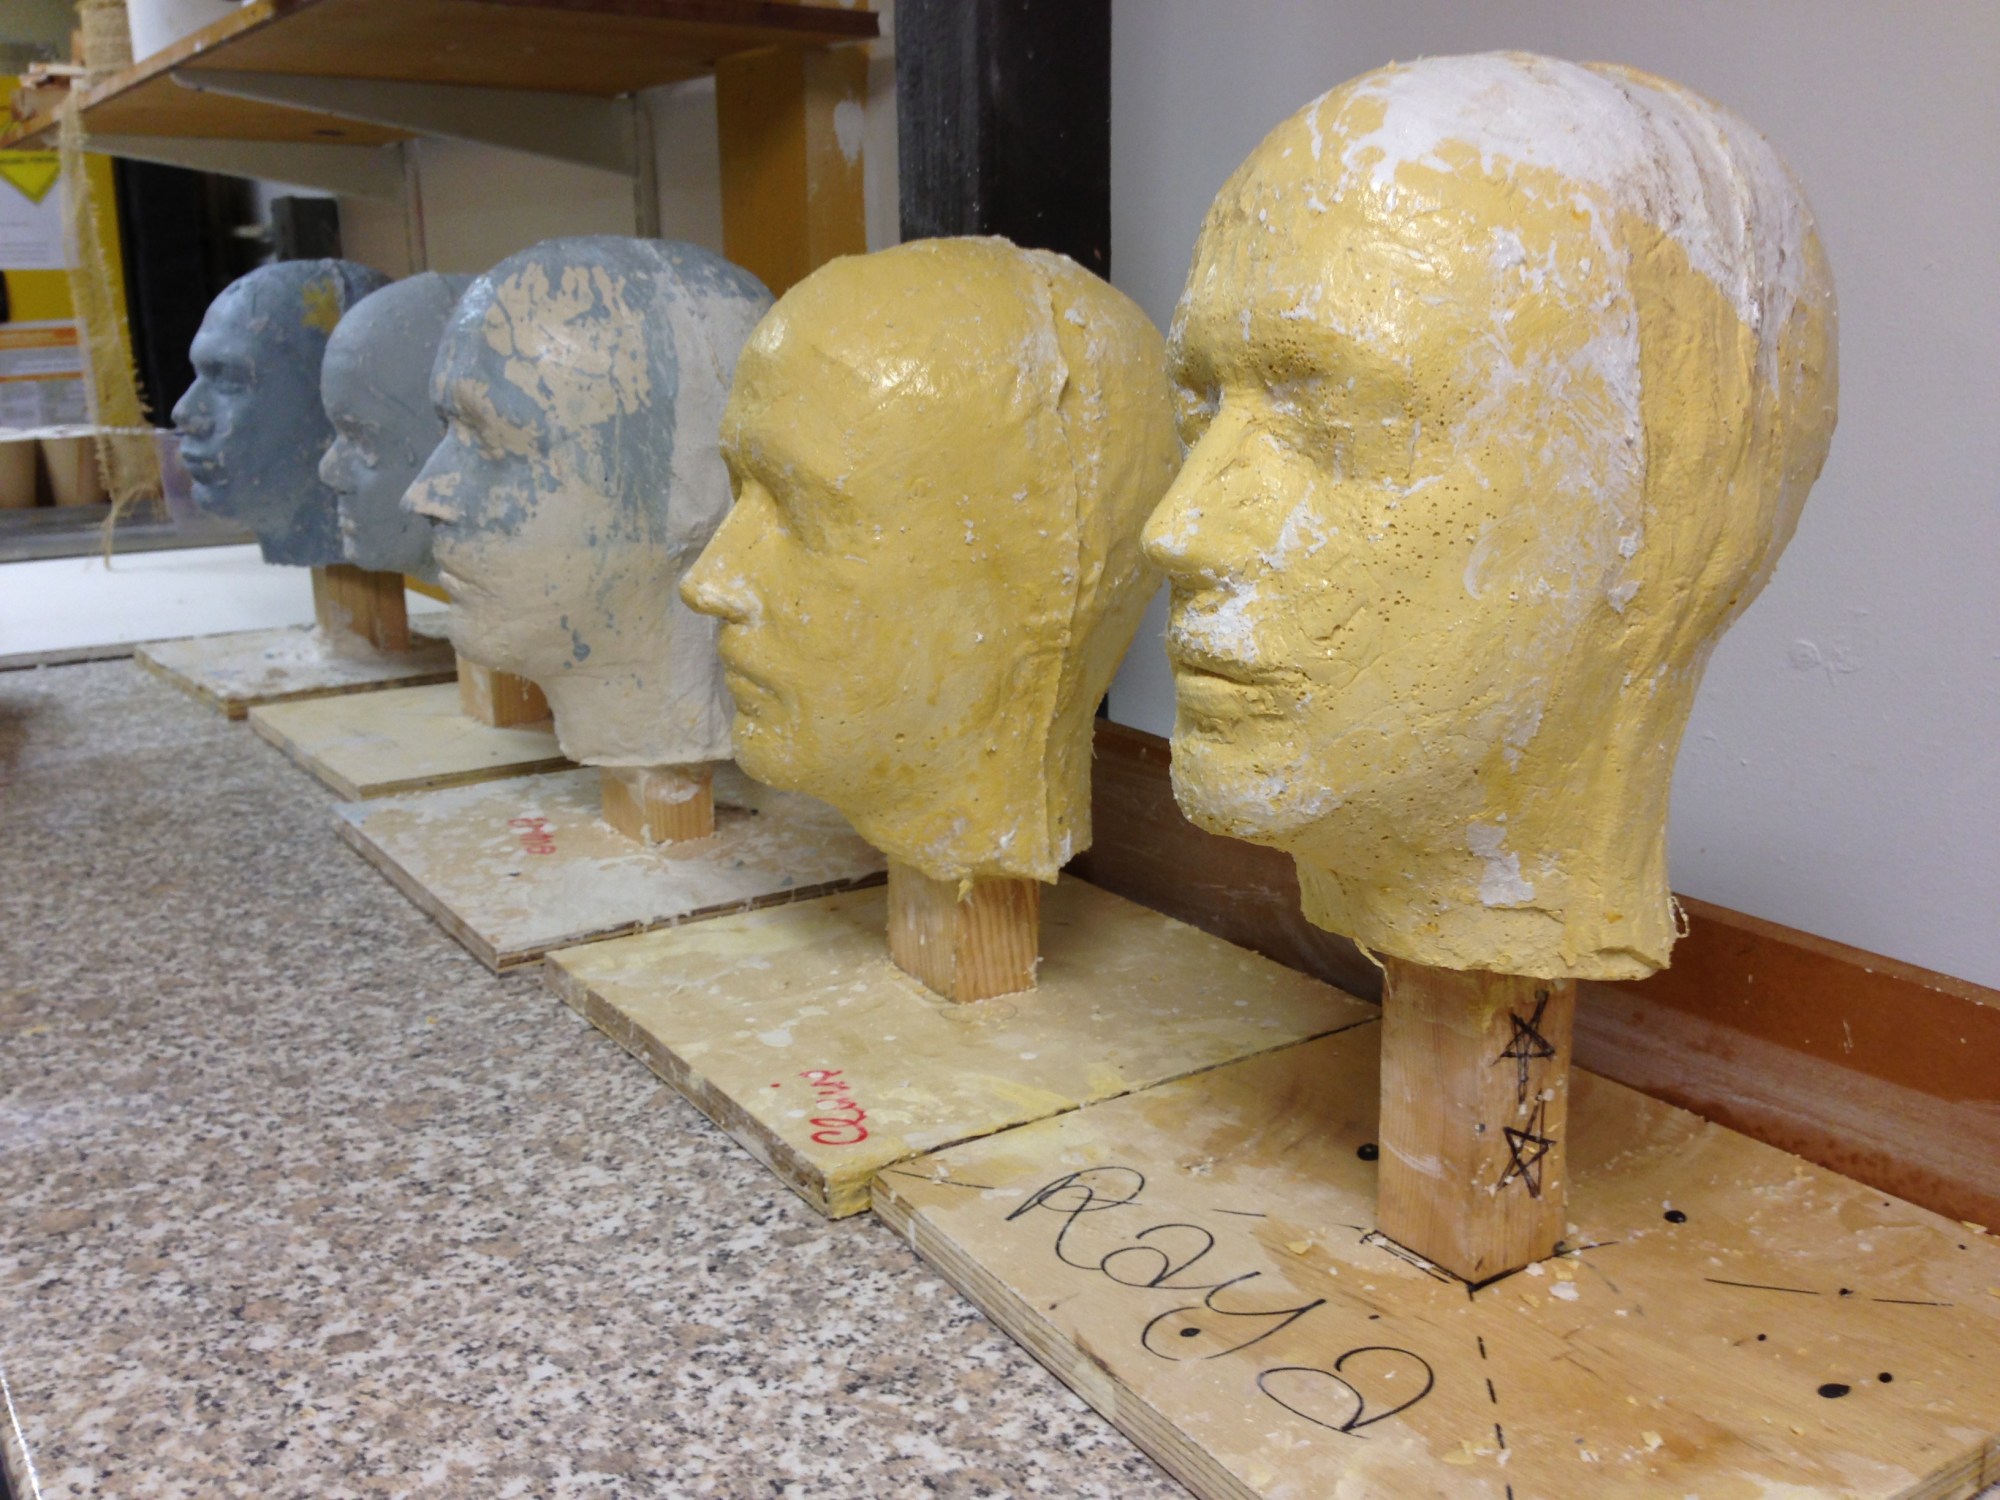
10. Next its time to build a stand for the head, which will be set into the plaster and once dried, you’d have a secure head cast on a stand, that could be used more than once and for future sculpting.
Cut a square 30cmx30m of plywood , that would be the base of the stand, and then a 40 cm 2x2timber post (or taller) that will be set into the plaster head.

After this screw the post to the base and then screw the 4 screws into the top of the post so that when placed into the plaster head, there is enough thickness around the top of the post to prevent it from possibly being weak.
11. Place your head mould upside down in a bucket, to catch any leaks.
then its time to mix up the plaster and pour it into the head mould. Add colour (a few drops of paint) to the plaster mix, as it is then easy to determine where my plaster head starts and the mod roc stops when it comes to peeling of the mod roc.
Pour the plaster into the head mould, but only small amounts gradually to just to check if there are any leaks, then keep repeating this.
Tap the sides to release any air bubbles in the plaster that could possible ruin the cast. Filled the mould three quarters of the way with plaster and then place the standing post into the top.
Fill the remainder of the mould with plaster, making sure not to over flow it. then set about levelling the stand while the plaster hasn’t set, as you don’t want to have an unlevelled cast that would be hard to work on when the cast is turned the right way up.
12. Set the post in what you see fit as a level, centred and straight position and then hold it in place until the plaster is firm and then release and it will no longer move.

Once the plaster is fully set later on, turn the mould upright and start to removed the reinforced plaster cloth and layers of mod roc to reveal your plaster cast of a head.


